# 从零开始写一个Demo
在Fair接入完成后,我们需要一个bundle才能更显示动态页面,那么怎么编写bundle呢?
这一节我们一起写一个demo页面,并逐步将demo做一些复杂调整。
# 1. 编写红色方块
首先我们写一个红色方块的代码。
下面的代码完全使用flutter编写,入参是一个文本。
class DynamicWidget extends StatelessWidget {
final String content;
const DynamicWidget({Key key, this.content}) : super(key: key);
Widget build(BuildContext context) {
return Center(
child: Container(
child: Text(
content,
style: TextStyle(fontSize: 30, color: Colors.yellow),
),
alignment: Alignment.center,
margin: EdgeInsets.only(top: 30, bottom: 30),
color: Colors.redAccent,
width: 300,
height: 300,
),
);
}
}
1
2
3
4
5
6
7
8
9
10
11
12
13
14
15
16
17
18
19
20
21
2
3
4
5
6
7
8
9
10
11
12
13
14
15
16
17
18
19
20
21
# 2. 将红色方块动态化展示
现在我们把它转换为Fair能够动态处理的bundle。
第一步:添加注解:
- @FairPatch() 修饰组件的定义,必须是顶级class
- @FairWell() 修饰属性参数,命名需要和注解参数一致
// 修饰当前页面为一个动态bundle资源
()
class DynamicWidget extends StatelessWidget {
// 修饰该属性会被build函数使用
('content')
final String content;
const DynamicWidget({Key key, this.content}) : super(key: key);
Widget build(BuildContext context) {
return Center(
child: Container(
child: Text(
content,
style: TextStyle(fontSize: 30, color: Colors.yellow),
),
alignment: Alignment.center,
margin: EdgeInsets.only(top: 30, bottom: 30),
color: Colors.redAccent,
width: 300,
height: 300,
),
);
}
}
1
2
3
4
5
6
7
8
9
10
11
12
13
14
15
16
17
18
19
20
21
22
23
24
25
2
3
4
5
6
7
8
9
10
11
12
13
14
15
16
17
18
19
20
21
22
23
24
25
第二步:现在然我们生成bundle吧
flutter pub run build_runner build
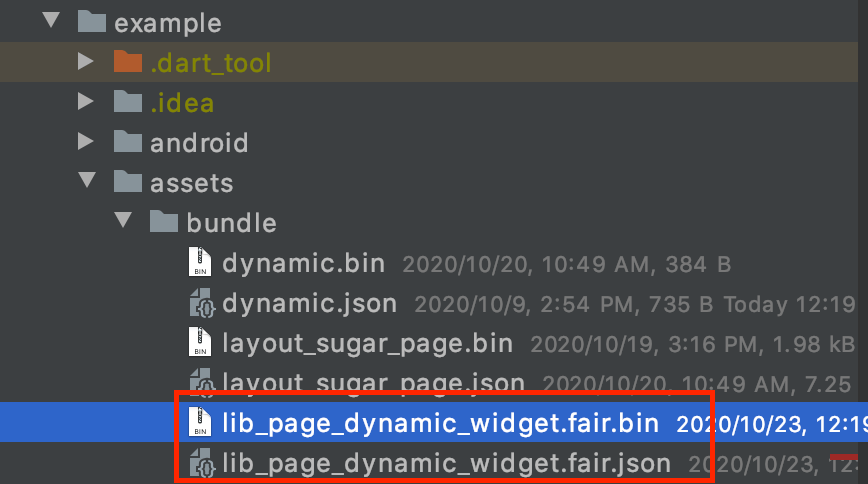
编译成功后,在build/fair目录下找到同名bundle资源:
- .fair.bin 格式为release产物
- .fair.json 格式为debug产物
- .fair.metadata 格式为元数据,标记了源码与产物的关联信息

第三步:复制产物并使用
现在我们可以把资源拷贝出来,放到assets下(别忘了先在yaml中配置assets目录/路径)

FairWidget(
  path: 'assets/bundle/lib_page_dynamic_widget.fair.bin',
  data: {'content': 'Red Box'},
)
1
2
3
4
2
3
4
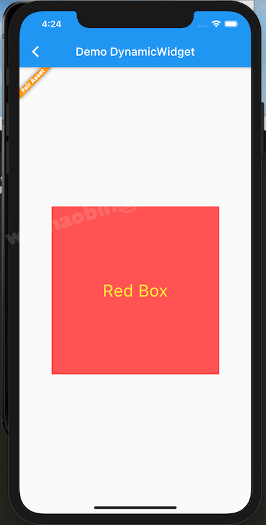
重新运行app后,可以看到新的效果,前后效果是像素级别一模一样的。
| Flutter源码效果 | Fair 动态效果 |
|---|---|
 |
# 3. 让红色小块复杂一些
现在我们希望重新编写红色小块,让他做一些调整,然后重新渲染出来(为了方便我们任然采用了内置路径,实际上可以通过url路径)。
具体改动如下:
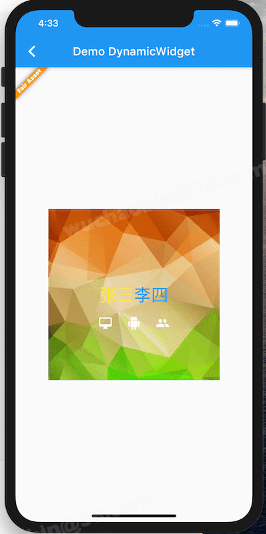
- 把文案改写一下,变成两个名字:张三李四
- 在文字下面加几个图标
- 添加一个网络图片,替换掉红色背景
()
class DynamicWidget extends StatelessWidget {
('data')
final Data data;
const DynamicWidget({Key key, this.data}) : super(key: key);
Widget build(BuildContext context) {
return Center(
child: Container(
child: Stack(
alignment: Alignment.center,
children: [
Text.rich(TextSpan(
text: data.content,
style: TextStyle(fontSize: 30, color: Colors.yellow),
children: [
TextSpan(
text: data.content2,
style: TextStyle(fontSize: 30, color: Colors.blue),
),
],
)),
Positioned.fill(
child: Icon(Icons.android, color: Colors.white),
top: 100,
),
Positioned.fill(
child: Icon(Icons.people, color: Colors.white),
top: 100,
left: 100,
),
Positioned.fill(
child: Icon(Icons.desktop_mac, color: Colors.white),
top: 100,
right: 100,
),
],
),
margin: EdgeInsets.only(top: 30, bottom: 30),
decoration: BoxDecoration(
color: Colors.redAccent,
image: DecorationImage(image: NetworkImage(data.url))),
width: 300,
height: 300,
),
);
}
}
class Data {
final String content;
final String content2;
final String url;
Data(this.content, this.content2, this.url);
}
1
2
3
4
5
6
7
8
9
10
11
12
13
14
15
16
17
18
19
20
21
22
23
24
25
26
27
28
29
30
31
32
33
34
35
36
37
38
39
40
41
42
43
44
45
46
47
48
49
50
51
52
53
54
55
56
57
58
59
2
3
4
5
6
7
8
9
10
11
12
13
14
15
16
17
18
19
20
21
22
23
24
25
26
27
28
29
30
31
32
33
34
35
36
37
38
39
40
41
42
43
44
45
46
47
48
49
50
51
52
53
54
55
56
57
58
59
编写完代码后,重新生成bundle,app加载新的资源即可。
注意我们的数据原相比一个字段,多了三个,为了方便,这里使用了Bean,当然也可以分散为多个变量:
- bean不能嵌套,名字需要于参数对齐
FairWidget(
  path: 'assets/bundle/lib_page_dynamic_widget2.fair.bin',
  data: {
    'data.content': '张三',
    'data.content2': '李四',
  'data.url':'https://ss3.bdstatic.com/70cFv8Sh_Q1YnxGkpoWK1HF6hhy/it/u=2665922796,3139592461&fm=26&gp=0.jpg'
  },
)
1
2
3
4
5
6
7
8
2
3
4
5
6
7
8
| 第一版效果 | Fair 动态效果 |
|---|---|
 |  |
如果你有服务器,可以把资源托管上去,比如
FairWidget(
  path:'http://a.b.c/xxx/hello.json',
  name: 'sample_list_view'
)
1
2
3
4
2
3
4